Magic in a car or how the brake pedal turns on the ignition
Please note that some links on autozaycev.com are affiliate links. We may receive commissions at no additional cost to you if you follow our links and make a purchase from one of our partners.
Privacy PolicyAffiliate Disclaimer

Greetings to all regular visitors and new guests of my virtual workshop. Today I will show you the real magic in the car Skoda Fabia of the first generation with an engine capacity of 1.2 liters. Ready? Then let's start the show.
Identifying the problem
In fact, there is not much to reveal here. When you press the brake pedal, the ignition turns on. And this happens even when the key is removed from the lock. This is the problem I have to deal with.


However, in the process of testing, I discovered a very interesting detail that led me to certain thoughts about the cause of the malfunction - it is burning when the ignition is on the icon "EPC" on the dashboard.

Why it glows and what problems in the work of the car signals, I will tell you about this in more detail.
What problems does the "EPC" light on the dashboard indicate?
Most car enthusiasts, especially beginners, often confuse the "EPC" icon with the "ESP" error, which appears when the vehicle's road stabilization system malfunctions. In fact, a burning "EPC" light signals problems in the vehicle's electrical system, which are due to a breakdown:
- brake system control unit, repeaters, or checkpoint controls;
- parking lamps;
- headlight washer motor;
- temperature sensors;
- the system that automatically turns on/off the interior lights;
- the system that controls the operation of the battery;
- the mechanism responsible for locking the key in the ignition switch;
- a sensor that monitors the engine oil temperature or the fuel level in the tank;
- elements controlling the operation of the electric seat actuators;
- fuses and other parts of the vehicle's electrical system.
This is only a list of the most common faults indicated by the "EPC" light illuminated. The exact cause of the malfunction can only be determined after computer diagnostics of the vehicle's electrical system and deciphering the error code received.
But since in our case the problem is tied to the brake pedal, I concluded that the cause of the "magic" should be sought in the brake system. That is, in fact, what I will do next.
Troubleshooting
Let's start the search for the breakage with the brake pedal. To get to the pedal assembly, you need to remove part of the torpedo. To do this:
- I unscrew one self-tapping screw on the end of the torpedo.

- One in this place.

- There's another one here.

- Here.

- And there's another one in this place.

To get to the upper screw, which is located on the left side of the steering column, you need to remove this cover, which closes access to this fastener.


Now disconnect the connector with the wires that go to the light switch.

To do this, you must remove the switch itself.

It's easy enough to do:
- the switch handle is pushed in and rotated to about the position of the parking lights;

- pull the knob toward you and remove the switch from the socket.

Now we will deal directly with the pedal assembly, for which all the above activities were carried out.

I try to depress the brake pedal again - the ignition turns on. How all this is connected to each other is still unclear. Indeed - magic, that's all.
Visually, there are no extraneous wires near the brake pedal. Therefore, let's move on.

Remove the air duct to get to the brake light sensor. This element is fastened on one self-tapping screw. By the way, all the self-tapping screws used in our car are Torx brand, star head, number 20.

Here is the brake light sensor itself. With a slight wiggle of it, the ignition is periodically turned on. But it's not quite clear what the cause is yet.

A few words about why the brake light sensor ("frog") may not work properly. The reasons are varied:
- fuse blown;
- contacts oxidized;
- one of the plastic elements inside the sensor broke off.
What happened in our case, I will find out.
Brake pedal connector test
- Take a tester and measure the voltage at the connector plugged into the brake light sensor.
- On the first contact, the instrument shows 12 V. On the second and third pin, the readings are similar. On the fourth contact we have ground.


- Disconnect the connector and measure again. On the first contact - 12 V, on 2, 3 and 4 - ground.


There seems to be no problem with the connector. Now, then, we need to remove the sensor and see what's wrong with it.
Stop light sensor test
To diagnose the sensor, it must first be removed. To do this, I carefully take the body of the "frog" and turn it counterclockwise. The sensor is removed.

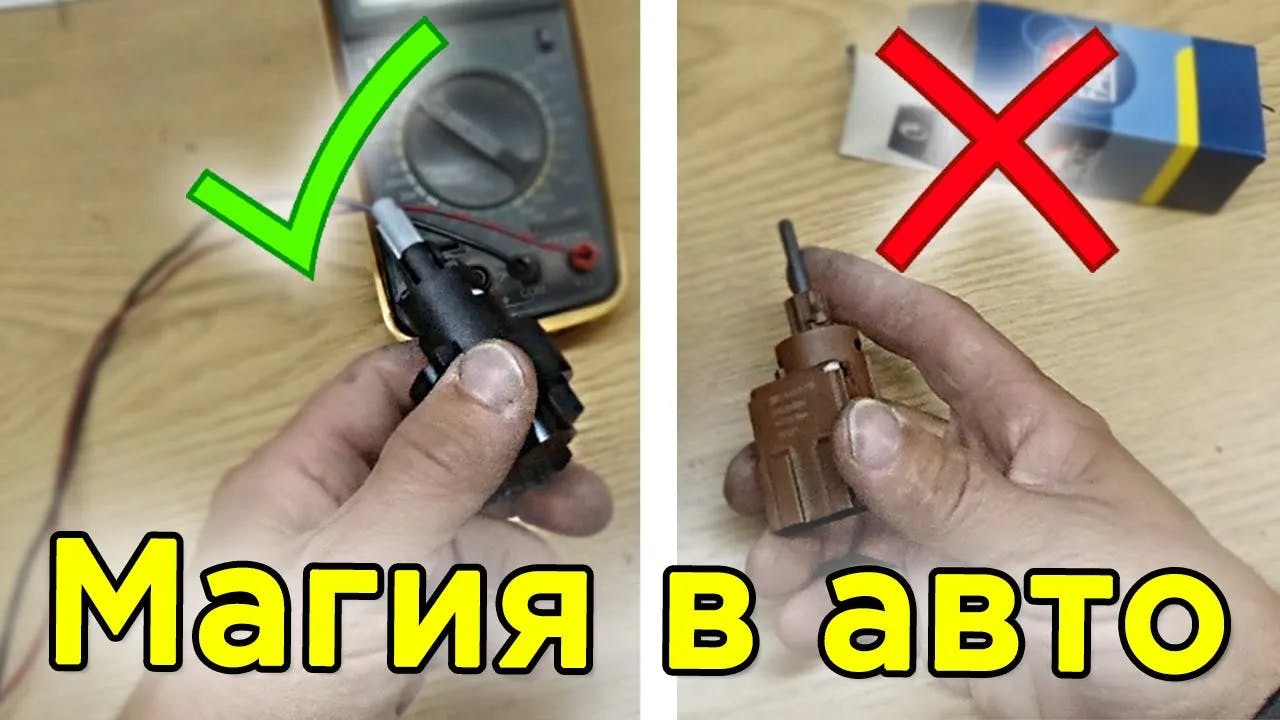
Now I move to the table, arm myself with a multimeter and start testing the sensor.

Before I proceed to the wiretap, I will briefly tell you about the types and working principles of such devices.
Depending on the type of vehicle and the drive of the sensor itself, they are divided into 3 main types:
- with mechanical drive. This type is the most common and is installed on most cars and trucks. The sensor consists of a housing, a fixed contact group and a button with movable contacts attached to it. When the brake pedal is pressed, the button is released, the contacts are closed and the brake lights come on;
- hydraulic, which are installed on large and heavy vehicles. As you can guess from the name, they are actuated by a hydraulic actuator. The housing of these products is made of metal and coated with a special coating that protects it from chemically active hydraulic fluids;
- pneumatic, the most common on tractors and trailers. The design of such sensors includes a diaphragm, a threaded fitting, a body with chambers and a contact group.
Our car, as you may have already guessed, has a mechanically actuated sensor, which I will now check.
During the diagnostic process, I determined that when the pedal is "pressed and not pressed", our two outermost contacts are connected. In other words, it turns out that the brake light is permanently shorted.


Now move back to our car and put the sensor in place.

Let's try to play around, supposedly, with the brake pedal by pressing the sensor button. "Return the pedal to the normal position," the ignition turns on.


Now I turn the ignition key and test the connector pins again.

As with the removed sensor, the gauge shows that the wires that are responsible for turning the brake lights on/off are permanently shorted. I press and release the button, and the brake lights continue to illuminate.

Conclusion - the brake light sensor is defective.
Problem Solution

Let's skip the procedure of finding and buying a new sensor, since now you can easily find the right part on the Internet. In general, I bought this part, which looks very similar to the old "frog".
Install the new sensor, press the brake pedal and look at the brake lights. They are lit.


Now, also with the ignition off, press the brake pedal and look at the dashboard. Nothing happens.

So, as you can see, the problem we had was in the stop light sensor itself, which was the source of the magic in our car.
In conclusion, I will say that this malfunction occurs very rarely, so there is no information on the Internet regarding the causes of its occurrence. More precisely, there was not before. So subscribe to my website and be aware of all the abnormal situations that may occur in the electrical system of your car.
Have a smooth ride! And until we meet again!
Rate this article please
Comments